Here are the 22 parts of a sphygmomanometer:
- Inflatable bladder
- Inflation bulb
- Air release valve
- Cuff
- Aneroid manometer gauge
- Bellow chamber
- Calibration rectangle/oval
- End valve
- Bladder hose/tube
- Artery indicator label
- Index and range markings
- Velcro
- Cuff size
- Faceplate
- Needle
- Serial number
- Graduation marks
- Air stem
- Lens
- Lens retaining ring
- Gauge holder
- Gauge clip
So if you want to learn all about the parts of a sphygmomanometer, their names, and their functions, then this article is for you.
Let’s jump right in!
Table of Contents
- #1 Inflatable Bladder
- #2 Inflation Bulb
- #3 Air Release Valve
- #4 Cuff
- #5 Aneroid Manometer Gauge
- #6 Bellow Chamber
- #7 Calibration Rectangle/Oval
- #8 End Valve
- #9 Bladder Hose/Tube
- #10 Artery Indicator Label
- #11 Index and Range Markings
- #12 Velcro
- #13 Cuff Size
- #14 Faceplate
- #15 Needle
- #16 Serial Number
- #17 Graduation Marks
- #18 Air Stem
- #19 Lens
- #20 Lens Retaining Ring
- #21 Gauge Holder
- #22 Gauge Clip

#1 Inflatable Bladder
While it appears that the cuff is inflating as you squeeze the inflation bulb, what’s actually being inflated is the bladder.
One of the main parts of the sphygmomanometer, the bladder, is an inflatable bag that fills up with air from the inflation bulb.
Usually placed inside a double-layered part of the cuff, the purpose of the inflatable bladder is to apply pressure on the limb to occlude the artery.
As it releases the air, the bladder gradually eases up compression on the limb so the sphygmomanometer can measure the blood pressure.
An inflatable bladder’s size plays an important role in the performance of a sphygmomanometer.
For a sphygmomanometer to obtain an accurate blood pressure reading, the bladder should be as long as about 80% of the upper arm’s middle and about 40% of its width.
A too-small bladder can result in a high blood pressure reading, while a too big bladder can give a low blood pressure reading.
It’s preferable to use a sphygmomanometer with an inflatable bladder made from latex-free material.
Hospitals and medical health facilities have been moving towards using latex-free equipment.
The reason is that using equipment and products made from latex can expose both patients and healthcare personnel to latex allergy—reactions range from mild skin irritation to anaphylaxis.
#2 Inflation Bulb
The inflation bulb is another main part of the sphygmomanometer. It’s a hand-held air pump that increases pressure inside the cuff wrapped around a person’s arm.
It consists of an internally hollow rubber bulb, the end valve, and the air release valve.
When the inflation bulb is squeezed, it pumps air through the bladder hose into the inflatable bladder.
As you pump more air into the bladder, the cuff places more pressure around the person’s arm.
When it’s not squeezed, the inflation bulb returns to its neutral state.
Air enters through the end valve, ready to be pushed through the air release valve when the bulb is squeezed.
Therefore, as a precaution, it’s recommended to partially squeeze the bulb to pump about 40-60 mmHg (millimetre of mercury) increments during each stroke.
This ensures that the patient doesn’t experience any discomfort or injury as the cuff inflates.
Most high-quality inflation bulbs, like the bladder, should be well-made from non-stick and non-cracking rubber.
What’s more, because there has been an increase in latex allergy, the material of the inflation bulb should ideally be latex-free.
#3 Air Release Valve
Also known as the deflation valve or the pressure release valve, the air release valve is a main part of the sphygmomanometer.
Its function is to allow for controlled deflation of the inflated bladder. This is crucial for accurate blood pressure reading.
The air release valve can be found on the side of the bulb connected to the bladder hose. It’s a needle valve made from a knob, a housing, and a unidirectional or outlet valve in the housing.
When the knob is turned to close the valve, the needle drops in the unidirectional valve. This valve is a rubber tube with a slit that’s closed at one side. This allows air to travel through only when the inflation bulb is squeezed.
The unidirectional valve also prevents unintentional pressure leakage by stopping the air in the bladder from flowing back to the bulb.
To inflate the bladder, you should close the air release valve by turning the valve knob clockwise.
To take the measurements, the valve should be opened to deflate the cuff.
The pressure rate should drop to around 2-4 mmHg per second.
After you’ve obtained the blood pressure measurements, turn the valve knob counterclockwise to release any remaining air in the bladder. Then, remove the cuff.
#4 Cuff
Sphygmomanometer cuffs aren’t actually a part of the original design.
The original device consisted of the inflation bulb and a mercury manometer.
It wasn’t until 1896 that the Italian internist Scipione Riva-Rocci added the cuff, becoming a standard part of the device.
The cuff is a band usually made from nylon. It’s designed to hold the inflatable bladder and apply even pressure to the limb.
A well-designed cuff is important for accurate blood pressure measurements.
Conversely, a cuff that wraps too tight or too loose around the arm can contribute to inaccurate results.
Another thing that could potentially affect a blood pressure reading is wearing the cuff on clothing.
While no conclusive evidence has shown that wearing cuffs on clothing significantly tampers with the results, health professionals still advise placing the cuff on a bare arm. That said, wearing a cuff on a clothed arm can cause some discomfort and irritation.
Not only is the cuff important because it holds the inflatable bladder, but it also contains a wide range of essential information regarding the sphygmomanometer, including other parts of the sphygmomanometer.
Remember, as soon as you’re done measuring blood pressure, remove the cuff right away.
Health professionals advise against leaving the cuff on for an extended period of time.
In addition, most sphygmomanometer manufacturers put caution against wearing the cuff for longer than 10 minutes at a time.
Any more than this, and the cuff can disturb blood circulation.
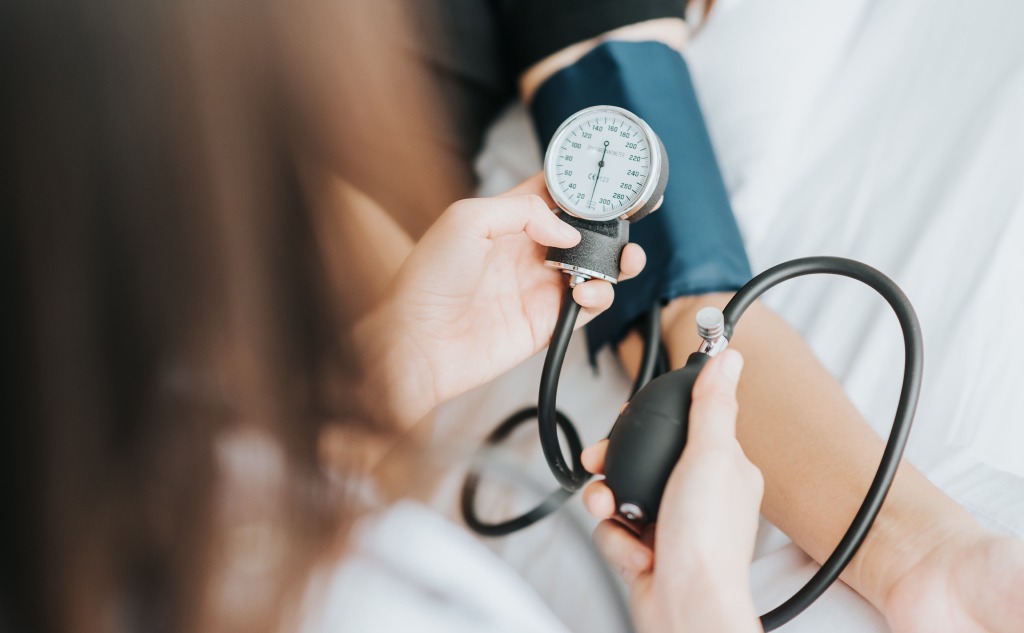
#5 Aneroid Manometer Gauge
The aneroid manometer gauge—the last main part of the sphygmomanometer—is a mechanical gauge that measures blood pressure in mmHg—which stands for millimeters of mercury.
As the bladder inflates, a series of copper or beryllium diaphragms inside the manometer expand.
Then, the gears inside translate the diaphragms’ linear movement and turn the manometer’s needle to a blood pressure reading. These readings are always recorded in pairs.
The upper number is the systolic blood pressure, which measures how much pressure the heart exerts on the artery walls when it beats.
The bottom number is the diastolic blood pressure, which measures how much force the heart exerts on the artery walls in between beats.
Aneroid manometer gauges, like any other blood pressure device, are quite delicate. Therefore, they require careful handling, so they produce exact measurements.
While aneroid sphygmomanometers give fairly accurate results, they require regular calibration because of their complexity. Failure to calibrate can produce inaccurate blood pressure readings.
#6 Bellow Chamber
The bellow chamber consists of one or more air-tight chambers with a top and a bottom membrane, also known as the bellows. It’s connected to the cuff through the bladder hose attached to the air stem.
The bellows are connected to the main gear inside of the manometer by a rod that rests laxly on top of them. If the rod moves, it forces the spiral spring to move the needle to which the spring is attached.
The bellow chamber is responsible for converting pressure to measurements.
When pressure rises in the cuff, it also rises in the chambers and the top of the bellows is pushed upwards. This causes the rod, gears, and needle to move in unison up and down.
When the needle moves, the manometer will convert the pressure to mmHg.
It should still be noted that there could be some slight changes to the bellows’ location from device to device. Still, they all function pretty much the same.
#7 Calibration Rectangle/Oval
Depending on the model, a calibration rectangle or oval will be printed on the mid-bottom of the manometer’s faceplate, right underneath the zero.
To accurately measure blood pressure, the sphygmomanometer should be calibrated regularly.
To know whether a sphygmomanometer is calibrated or not, check the needle’s position.
It should be standing right on the rectangle or oval. If it’s not, then the device won’t accurately measure the blood pressure.
There have been studies conducted regarding uncalibrated sphygmomanometers. They’ve almost always concluded that overlooking calibrating sphygmomanometers results in undetected hypertension.
That’s why it’s advisable to have an accredited laboratory or a technician calibrate your device annually.
#8 End Valve
Located at the tail-end of the inflation bulb, the end valve is a metal ball-type valve. It’s a second unidirectional valve made to allow air to enter the inflation bulb.
The action of squeezing and releasing the inflation bulb closes and opens this valve, letting new air into the bulb.
As you squeeze the inflation bulb, the end valve closes. The air is then forced through the unidirectional valve on the other side of the bulb.
Both the end and release valves work together to pump more air into the inflatable bladder and remain there until the air release valve is unscrewed and the pressure is released.
#9 Bladder Hose/Tube
The bladder hose is a flexible, hollow, and thin tube that should be attached to the inflation bulb, pass through the inflatable bladder, and connect to the manometer.
During the sphygmomanometer assembly, one side of the hose is placed on the side of the inflation bulb where the air release valve is.
The other end of the bladder hose should be attached to the inflatable bladder.
When you’re assembling a sphygmomanometer, make sure that the bladder hose is attached securely on both ends.
If the hose isn’t connected properly, air that should flow to the inflatable bladder may escape—resulting in insufficient pressure and an imprecise blood pressure reading.
One way to make sure that you’re wearing the cuff correctly is the position of the bladder hose. It should be on the inner side of your arm, next to your ribs.
#10 Artery Indicator Label
The artery indicator label is a textile label that’s sewn into the sphygmomanometer’s cuff. Its purpose is to tell us the proper cuff positioning.
Most artery indicator labels have two arrows pointing downwards for both arms and the word “artery.”
When measuring blood pressure, the artery indicator label should be directly placed over the brachial artery. This is another way that we can guarantee that the cuff is worn right, which increases our chances of receiving an exact blood pressure reading.
#11 Index and Range Markings
The index and range markings are printed on the sphygmomanometer cuff to guarantee an accurate cuff fit. These help the sphygmomanometer correctly measure blood pressure.
The index marking tells us if we need a smaller or a larger cuff size.
When you wrap the cuff around an arm, if the index line passes both range lines, then you need a smaller cuff.
On the other hand, if the index line doesn’t reach the first range marking, then you need a larger cuff.
Alternatively, you can simply look at the range markings. In between the lines, you’ll find the arm sizes that accurately fit the cuff.
The arm size is the circumference measured at the biceps. Take a measuring tape and
#12 Velcro
Velcro is used to seal the cuff around the arm. This is a fastener that’s made from two thin plastic sheets; one has small loops while the other has equally small hooks.
When pressed together, the hooks interlock with the loops making them adhere together.
While the pressure applied around the arm by the sphygmomanometer is quite strong, velcro can hold the cuffs tight. What’s more, it could be easily fastened and removed from around the arm.
#13 Cuff Size
On most sphygmomanometer cuffs, you’ll find printed in bold a label that indicates the cuff size. It includes small adult size, adult size, large adult size, and extra-large adult.
According to the American Academy of Family Physicians, there are recommended cuff sizes to receive an accurate blood pressure measurement:
- Small adult size ranges from 22 to 26 cm
- Adult size ranges from 27 to 34 cm
- Large adult size ranges from 35 to 44 cm
- Extra-large adult size ranges from 45 to 52 cm
Cuff size is crucial because it affects how the manometer reads pressure.
#14 Faceplate
The faceplate in a manometer is a piece of metal or plastic that’s meant to protect the internal components of the manometer.
It also serves as a template for the graduation marks, calibration rectangle/oval, the needle, manufacturer’s trademark, and the serial number.
#15 Needle
The needle is the arrow that points at the blood pressure measurements inside of a manometer. It moves as a result of the pressure rising inside the bellow chambers.
As the pressure fluctuates, the connecting rod is pushed up and down, in turn moving the spiral spring. This spring moves the needle, and we get our blood pressure reading.
#16 Serial Number
In a standard sphygmomanometer, you can find the serial number stamped on the faceplate, right above the calibration rectangle or oval.
It should also be under the manufacturer’s trademark.
The serial number is automatically assigned to any manometer. It’s permanently and clearly etched into the manometer so you can check for the device’s legality.
#17 Graduation Marks
Graduation marks on a sphygmomanometer are the lines and numbers that circle the faceplate. As the needle moves around, these marks help us measure blood pressure in mmHg.
Numerical graduation marks on a sphygmomanometer begin from 0 to 300.
The first thump—Korotkoff sound—you hear indicates the systolic blood pressure when you measure blood pressure.
You should continue to hear a thumping sound until you reach the last thump, which indicates the diastolic blood pressure.
#18 Air Stem
A type of valve, the air stem opens to allow air to go into the bellow chamber.
Then, as the air creates pressure inside of the bellow chamber, the air stem closes, preventing any air from escaping back into the bladder hose.
The air stem is a piece of metal that extends from the bottom of the manometer. You can attach and detach the bladder hose to it.
#19 Lens
The lens of a manometer is usually made from a hard, transparent piece of plastic or glass.
It offers protection to the interior parts of the manometer from any exterior damage.
#20 Lens Retaining Ring
Also referred to as the lens retaining rim, this ring is a type of fastener that uses even, circular force to securely hold the manometer’s lens in place.
Lens retaining rings are usually made from stainless steel to ensure that they don’t rust or corrode.
#21 Gauge Holder
The gauge holder is another piece of textile that’s sewn on opposite sides to the cuff.
As the name suggests, this piece of textile is meant to hold the sphygmomanometer’s manometer in place when measuring blood pressure.
As the blood pressure is being measured, it’s recommended that neither the person nor the manometer moves around too much to prevent incorrect readings.
That’s where the gauge holder comes in handy. You can just attach the manometer by its clip to the gauge holder.
#22 Gauge Clip
The gauge clip is a piece of metal that protrudes from the back of the manometer. This is how we can attach the manometer to the gauge holder on the sphygmomanometer cuff.
When you’ve finished measuring blood pressure, you can attach the manometer’s gauge clip to the gauge holder, fold the cuff, and store the sphygmomanometer away until you need it again.